Installing Windows XP from a USB stick on the Asus Eee PC
Published Feb 2008, last updated Mar 2008
Note: This tutorial works on all computers, not just the Asus Eee PC.
Pre-requisites
- Windows Xp Pro slipstreamed with SP2.
- Bootable Usb flash drive.
- Asus Eee Pc or any other computer with 'Boot from Usb' option supported by the BIOS.
- Download Usb Multiboot2
- Download Bootsect, Password: 123.
Since this zip contains a bootloader which is classified as malware by google, I have added a password to this file.

Formatting
Extract the files in USB_MultiBoot2.zip. Double click the executable named USB_MultiBoot2.cmd
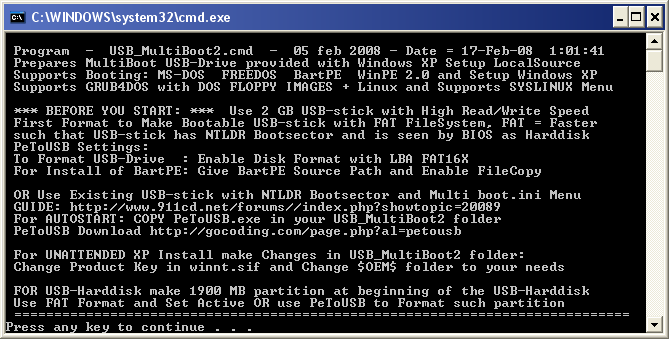
Press any key to continue. The next window will look like this.
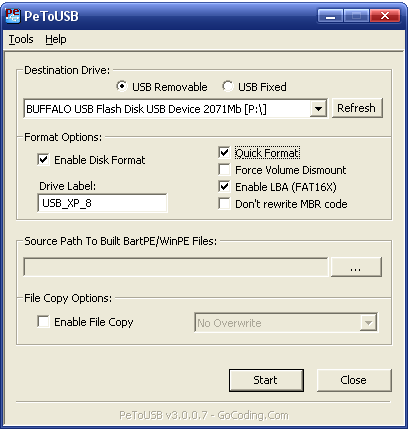
Select your Usb flash drive from the drop down box. Make sure the 'Quick Format' checkbox and 'Enable LBA' checkbox is checked. Once the format is complete Do Not close the PeToUsb window and USB_MultiBoot2 window. If a new window pops up which displays the contents of the Usb drive, close that window.
Extract the files in Bootsect.zip. Open a new command prompt window. Browse to the directory where you have kept bootsect.exe
Now type "bootsect.exe /nt52 P:" (without the quotes) and press enter.
Note P: is the drive letter of my USB thumb drive. Your drive letter may be different so make the change accordingly. This command writes the correct boot sector to your usb stick which allows the computer to boot from the Usb drive.
Note: When running bootsect.exe command you cannot have any windows open displaying the contents of the Usb drive.
If the command executes successfully you will see the following message.

You can close this command prompt window and the Petousb window. Do not close the USB_MultiBoot2.cmd window by mistake. You will get a window similar to this one.
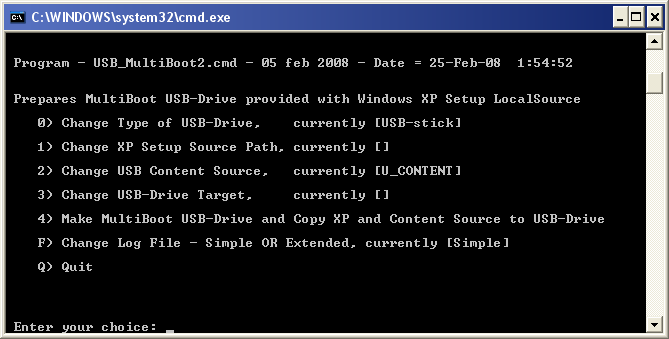
Press 1 and Enter. A browse window will open, browse to the location of your XP setup file (Can be your cd-rom drive or some folder on the hard disk)
Press 3 and enter the drive letter of your USB drive. (its not case sensitive) After you have finished, press 4 to start the process.
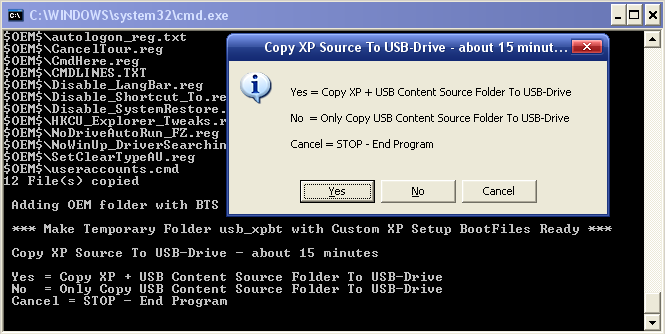
Click on Yes to continue. The script will then copy windows XP to the Usb drive. This may take a while depending on the write speed of your Usb stick.
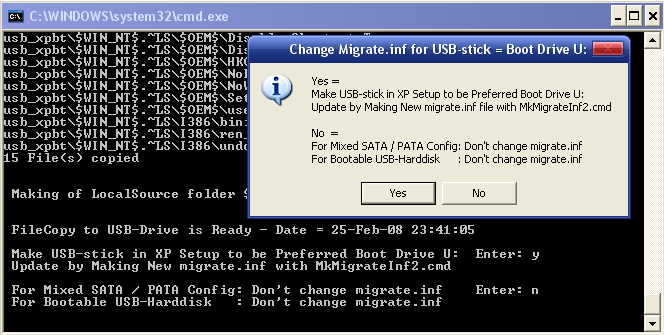
Click on Yes to continue. When the script finishes click on 'Any' key to close the command window.
Booting
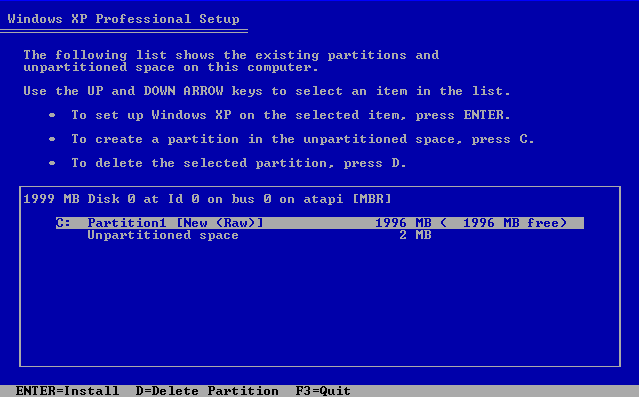
Insert your Usb stick and start your computer. Make sure your Eee pc is configured with your USB flash drive as the first boot device in the BIOS. If you have properly selected the flash drive as your primary boot device you will get a startup menu. Select option 1 'TXT Mode setup windows XP'. You have to delete ALL partitions and create a single partition. Use only C: Drive of the hard disk as the partition for installation of Windows XP and then select Quick format with NTFS file system.
Note: A small portion will be unavailable to partition. This is normal. In this example, it is 2 MB.
From this point on the installation is just like a normal XP installation. Once the text mode portion of the setup is complete it will boot into GUI mode.
Do not remove the Usb flash stick until you see the XP desktop.
I hope this worked for you. There is a basic Help file (Help_USB_MultiBoot2.txt) in Help_Info folder which you can use for trouble shooting if incase you encounter some problems or you can even email me.
Use Nlite to reduce the size of your XP installation. On the Asus Eee PC space is a premium. Note: If you use Nlite make sure you don't remove the manual installation files.
Note: You can disable System Restore and Paging file, you don't really need them on the Eee PC. Do not connect any other Usb hard disk during the installation. It screws up the drive letter order.
Sumedh k